
Every user is unique and therefore your website should appeal to every user in a unique way. With an extra piece of code on your website you can perform website experiments and personalize your website to determine the optimal experience for your target audience. Google created Google Optimize (free) and Google Optimize 360 (paid, price upon request) to help you with this.
In this article we will show you how to set up Google Optimize and create an experiment to personalize your website based on the industry of companies visiting your website.
Advantages of Google Optimize
Before we set up the software, let’s check out some reasons why you should use Google Optimize for website personalization:
- It’s free to use
- Great integration with other Google products such as Google Analytics and Google Ads
- Relatively simple to set up
- Easy to use visual editor
The free version of Google Optimize gives you the opportunity to run 5 different experiments simultaneously and use the software on one website.
In this article we will focus on Google Optimize because it will generally be a great – free! – solution for most B2B websites and it’s also a great way to start with B2B website personalization.
Setting up Google Optimize
Before you start, make sure you use Google Chrome because most of the features will work in this browser.
1. Create your Optimize-account and Optimize-container
- Go to Google Optimize website.
- Click ‘create new account’.
- Add your account name.
- Add your container name.
2. Link Google Optimize to Google Analytics
- Click on your new container
- Click in the information window of your.
- In the property window of the Analytics-property, select the one that’s the domain where you would like to run your personalization experiment.
3. Install the Google Optimize snippet code on your website
We recommend using Google Tag Manager (GTM) to add the Google Optimize snippet to your website. And make sure you also load Google Analytics with GTM so Google Optimize will work properly.
Go to your Google Tag Manager account and create a new tag. Select Google Optimize as the tag type. After that, enter your Google Analytics Tracking ID and also your Optimize Container ID.
Now you can choose the trigger options. Select ‘all pages’ if you are going to set up experiments on your entire website. Save the tag and GTM is all set up.
More information about installing the snippet with GTM.
If you are not using GTM, simply follow the instructions given after clicking ‘View Snippet’. You will probably manually have to add one line to your existing Google Analytics tracking code on your website pages.
4. Install the Google Optimize extension for Google Chrome
After the setup is done, make sure you to install the Google Optimize extension for your Chrome browser. With this extension you can use the Optimize visual editor to change your webpages by tweaking the text, images, buttons and more for personalization.
Set up your first personalization
In this personalization, we are going to change the header text of a landing page based on the industry class of the visitor. The industry information is based on our SEE API that allows you to see firmographic information such as industry, number of employees etc. based on the visitors’ IP address.
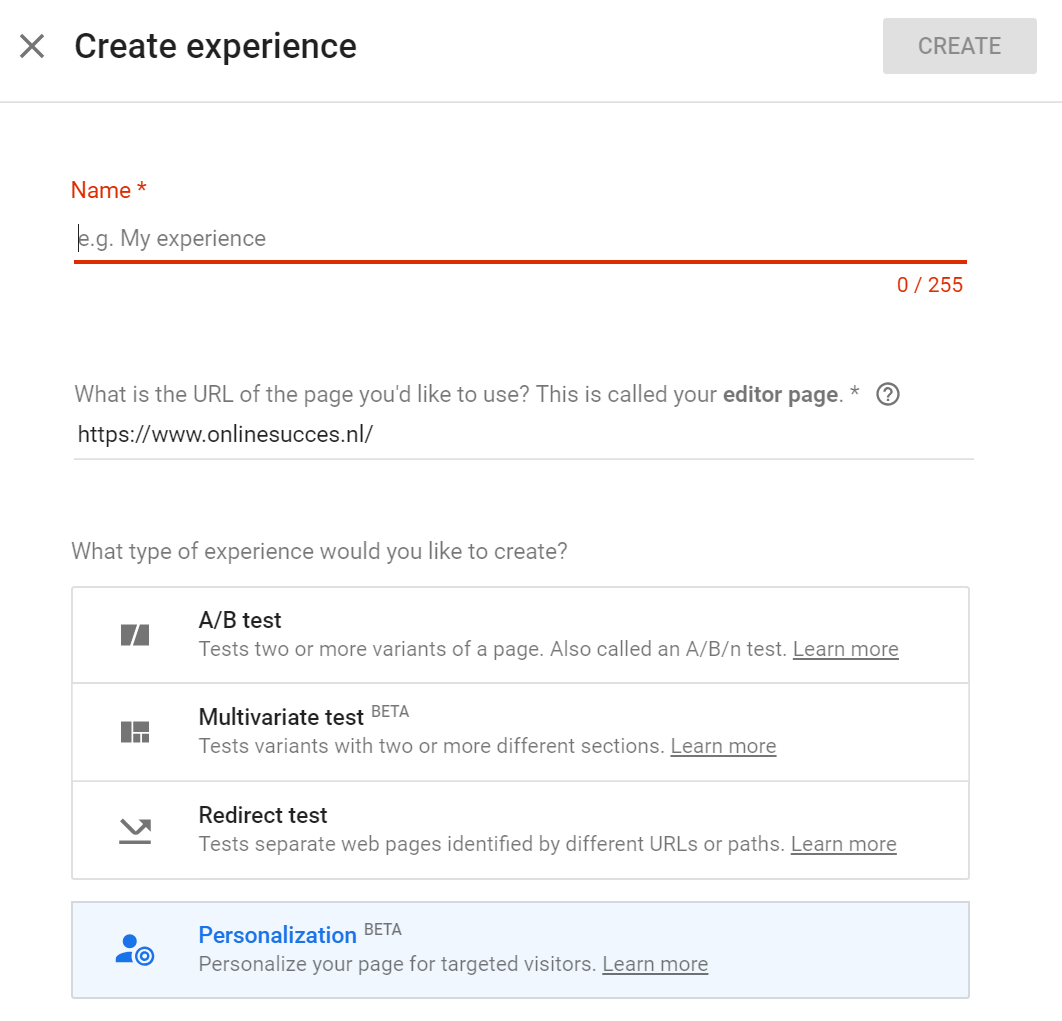
1. Create the personalization experience
Start with clicking ‘create experience’ and add a name to your experiment. After that, select the page or pages you would like to personalize. Make sure you select the ‘personalization’ experience on the bottom of the window:
 2. Customize your website
With the Google Chrome extension, you can use the visual editor to change specific parts of your website to personalize. For this example, we would like to target companies with financial or insurance activities.
With the visual editor, we will change the standard header “B2B marketing software that generates sales opportunities and saves time” to “B2B marketing software for banks and insurance companies” for finance / insurance industry visitors:
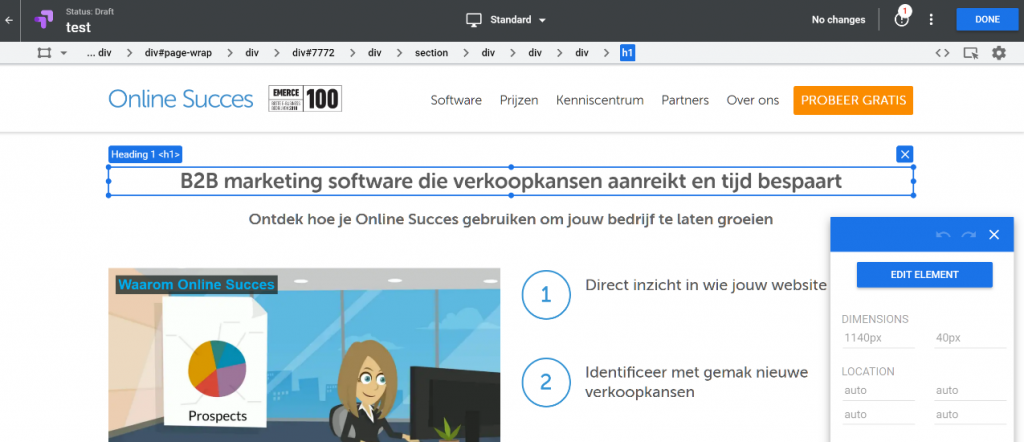
Below the personalized header:

3. Add targeting rules for your site visitors
You can activate an experiment purely aimed at smartphone users. Or you can change the message on your website if your office is not open. Below are the targeting options that Google Optimize supports:
- URL-targeting: select specific webpages for your experiments
- Behavior targeting: new or returning visitors, visitors from specific referral sources.
- Geo targeting: target visitors from a specific country, province or city.
- Technology targeting: target visitors from selected devices (like smartphones) or browsers
- JavaScript variabele: a specific variable from the source code of your webpages
- A custom JavaScript variable: such as the Companda SEE variables to specify an industry or number of employees of a recognized company.
- Query parameter: specific parameters in the webpage URL.
- Data layer variable: target based on values stored in the data layer.
In the free version there is no possibility to target Audiences. This remains reserved for the paid Google Optimize 360 platform.
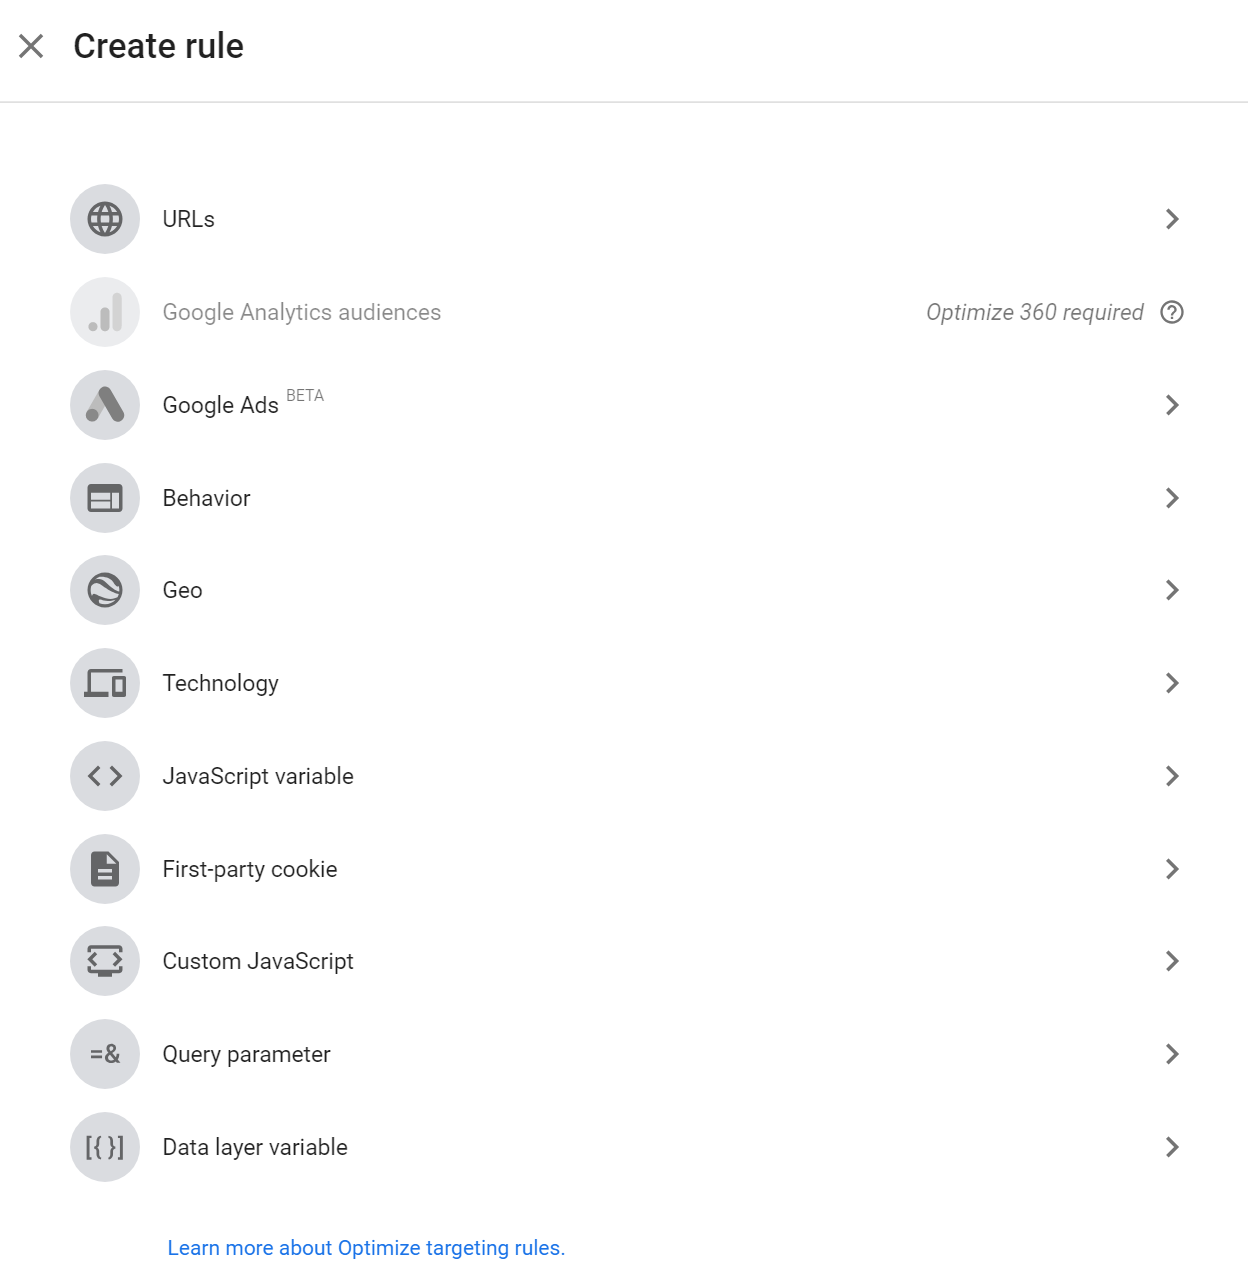 In our example we want to target a specific industry class. Select the following rule:
- Custom JavaScript – when a specific industry class is found by Companda SEE based on the visitor’s IP. You can find the custom JavaScript in your Companda portal. The industry class value of K resembles to companies that are in the European Economic Activity classification Financial and Insurance
 After setting up the targeting rules, you can also add a description for your personalization experiment.
4. Link the Google Analytics property
Next, select the Google Analytics property and view that you like to use. Make sure you check ‘measure this’ to view the reports in both Optimize and Analytics.
You can keep the activation event on the default ‘page load’ setting. When you are done, you can either start your personalization directly or schedule it.
Congratulations, you have just set up your personalization!
Which pages should you personalize?
You could start by personalizing the pages of your website that have the most visitors. We started out with our product landing page that has a lot of paid traffic.
Here are some suggestions of pages and what you could do to personalize them:
- Homepage and other important landing pages – change the headline text or ‘hero shot’ image to reflect the industry of the visiting company, add relevant industry content
- Call to actions – based on the company size you could change the call to action to contact sales for enterprise visitors or start a free trial for visitors from small businesses
- Blog articles – show specific whitepapers or e-books for the industry of visitor’s company
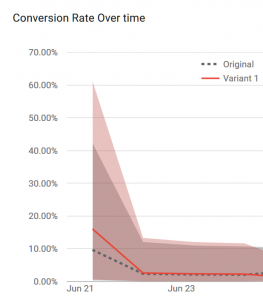
How do you measure the results?
You could also set up your experiment as an A/B test in Google Optimize. This way, you won’t start directly with a personalization.
By setting up an A/B test you can send 50% of the visitors to the old version and the other 50% of the visitors will see the personalized version. If you also add your Google Analytics goals to Google Optimize, you can see if your personalization is improving the total experience, conversion rate or other metrics. Below is a graph of the conversion rate of an A/B test in Google Optimize:
 Differences between Google Optimize and 360
If you choose the extended paid version of Google Optimize called Google Optimize 360, you have more options. Especially the number of experiments you can do is higher, because with the free version there is often a limitation. Here are the main advantages of Google Optimize 360:
- You can run more experiments simultaneously
- You can run more multi variate experiments (up to 36)
- You can use Google Analytics Audiences to use in your experiments.
See the full difference list on the Google Optimize website. We think that the paid version is suitable for enterprise websites and anyone can easily start with the free version.
Conclusion
With Google Optimize it is possible to run different tests of website pages to see which colors, formats, versions, images or texts convert properly. And it is also possible to personalize the pages of your website based on different criteria. One of the main advantages it the integration with Google Analytics.
Furthermore, Google Optimize is very easy to use. The possibilities in the free version are surprisingly complete and it should be a tool for every B2B marketeer starting out with website personalization and optimization especially on the pages that need to convert.
Do you use Google Optimize, but need help after reading this article? We love Google Optimize and are happy to help you answer your questions!